Planning & Prep
Steak Cooking Chart: Your Guide to the Perfect Sear

Nailing that ideal steak finish at home can be a real guessing game, especially if you’re new to the grill or experimenting with different cuts and cooking methods.
This article will break down everything you need to know, from choosing the right cut to achieving a flawless sear. We’ll also unveil your secret weapon: a comprehensive steak cooking chart that takes the guesswork out of cooking times and temperatures. With this guide in hand, restaurant-quality steak nights are just a sizzling pan away.
Table of contents
- Steak cooking chart
- Comparing steak cooking levels
- How to check if your steak is done
- Tips and tricks for the perfect steak
Steak cooking chart
Achieving a perfectly cooked steak comes down to temperature and thickness. This chart provides a guide for cooking times based on both factors so you can achieve a juicy and flavorful finish every time. Use a meat thermometer for the most accurate results.
| Doneness | Temperature | Time per side | ||||
| 1” | 1 ¼” | 1 ½” | 1 ¾” | 2” | ||
| Rare | 120-129°F | 2-3 min | 2-4 min | 3-4 min | 4-5 min | 4-5 min |
| Medium-rare | 130-139°F | 3-4 min | 4-5 min | 5-6 min | 6-7 min | 7-8 min |
| Medium | 140-149°F | 4-5 min | 5-6 min | 6-7 min | 7-8 min | 8-9 min |
| Medium-well | 150-159°F | 5-6 min | 6-7 min | 7-8 min | 8-9 min | 9-10 min |
| Well done | 160+°F | 6-7 min | 7-8 min | 8-9 min | 9-10 min | 10-12 min |
Note: These are approximate times and may vary depending on the cooking method (grill, pan, etc.) and the cut of steak.
Download the steak cooking chartComparing steak cooking levels
A steak’s flavor profile can change a lot based on how long you cook it — the ideal steak cooking level comes down to personal preference and safety considerations. Whether you prefer a melt-in-your-mouth feel or a firmer finish, here’s what to look for when cooking rare to well-done steaks for a high-protein meal.

Rare
Temperature: 120-129°F
Best for: Lean cuts (filet mignon, flat iron, flank steak, tenderloin)
A rare steak is cooked for a minimal amount of time — usually just two to three minutes per side — to achieve a tender and flavorful finish. The inside of the steak boasts a vibrant red from the meat’s myoglobin, a protein that holds onto oxygen rather than being cooked out.
While the outside of the cut is seared for a delightful crust, the heart of the steak remains juicy, practically melting in your mouth. This is a great finish for lean cuts since they have less marbling (fat within the muscle) and require less cooking time to stay tender.
Note: When cooking rare steak, make sure the internal temperature reaches a minimum of 120°F so it’s safe to eat.
Medium-rare
Temperature: 130-139°F
Best for: Marbled cuts (ribeye, New York strip, porterhouse/T-bone)
Medium-rare steak doneness strikes a delightful balance between juicy tenderness and a satisfying sear. The inside is slightly less red than a rare steak, indicating a slightly warmer temperature as the myoglobin starts to cook away. The outer layer is beautifully browned and caramelized, offering a delightful textural contrast to the soft interior.
Cooking a steak to medium-rare is ideal for most cuts, especially those with good marbling like ribeye, New York strip or porterhouse. The fat content helps distribute heat evenly throughout the steak, preventing it from drying out at this doneness level.
Medium
Temperature: 140-149°F
Best for: Marbled cuts, leaner cuts with preference for more doneness
If the idea of eating “raw” steak makes you squirm but you still want a juicy finish, medium steaks are a satisfying compromise. This level of doneness is best for those who prefer a warmer steak with a firmer texture.
Cooking a steak to medium is well suited for cuts with a good amount of marbling, similar to medium-rare. Ribeye, New York strip, and porterhouse continue to be great options here. The fat renders further at this temperature, infusing the meat with even more flavor. However, medium can also work for leaner cuts like flank steak or skirt steak if you’d like them to be cooked through completely without drying out.
Medium-well
Temperature: 150-159°F
Best for: Marbled cuts
A medium-well steak caters to those who enjoy their steak cooked through with just a hint of pink. This doneness can still be tender but won’t melt in your mouth like rarer options.
Cooking a steak medium-well is suitable for cuts with good marbling, like ribeye or New York strip. The fat helps baste the meat and prevents it from drying out excessively. Be careful not to overcook your steak when opting for a medium-well finish — a good sear followed by indirect heat will help maintain tenderness.
Well done
Temperature: 160°F+
Best for: Marbled cuts with less tenderness (ribeye, New York strip), less tender cuts (flank, skirt steak), ground beef
A well-done steak is cooked all the way through, with no hint of pink remaining in the center. This results in a steak with a firm texture and a browned appearance throughout.
Well-done steaks may become dry and tough if not cooked properly. When cooking well-done steaks, use a slow cooking method like oven finishing to prevent burning and drying out the meat.
Some people simply prefer the firmer texture and richer, almost caramelized flavor of a well-done steak, but it’s also a safe choice for those concerned about consuming raw or undercooked meat. A well-done steak ensures all bacteria is eliminated, which can be important for pregnant women, young children or people with weakened immune systems.
Grab it now on Instacart:


How to check if your steak is done
Whether you crave a juicy, rare center or prefer your steak cooked through, knowing exactly when to take it off the heat is key. This section will equip you with two essential tools: the trusty meat thermometer and the art of the finger test.
Meat thermometer
A meat thermometer is a grilling pro must-have for achieving the perfect level of doneness. Here’s how to use one:
- Pre-heat your steak: For an accurate reading, insert the thermometer into the thickest part of the steak after searing it on both sides. This ensures the internal temperature reflects the doneness of the center, not just the seared exterior.
- Insert and wait: Push the thermometer probe directly into the center of the steak, avoiding any bone or fat. Hold it steady for a few seconds to get a reliable reading.
- Know your target temperatures: Refer to our steak cooking chart to find the recommended internal temperature for your desired level of doneness (rare, medium-rare, etc.).
- Remove and rest: Once the internal temperature is 5°F (3°C) from your target, remove the steak from the heat. This accounts for carryover cooking, as the temperature will continue to rise slightly after removing it from the heat source. Tent the steak loosely with foil and let it rest for five to 10 minutes before slicing and serving.
Finger test
While a meat thermometer is the most accurate method, the finger test can be a handy technique to gauge steak doneness once you get a feel for it. Here’s how to do it, along with a reference chart:

- To test a rare steak for doneness: Press on the fleshy part of your palm below your thumb. It should feel soft and squishy, like a rare steak.
- To test a medium-rare steak for doneness: Touch your thumb and index finger together and press on your palm. It should feel slightly firm with some give.
- To test a medium steak for doneness: Touch your thumb and middle finger together and press your palm. It should feel more firm but still have some give.
- To test a medium-well steak for doneness: Press your ring finger and thumb together — the base of your thumb should feel firm with minimal give.
- To test a well-done steak for doneness: Touch your pinky finger and thumb together. The base of your thumb should feel very firm with little to no give.
Observe how the fleshy part below your thumb feels compared to your steak to determine if it’s finished cooking.
Tips and tricks for the perfect steak
You can’t take a steak out of its package, throw it on the grill and expect a swoon-worthy result. From choosing the best cuts to adding the finishing touches, there’s a lot more that goes into prepping a succulent steak.
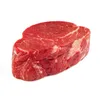
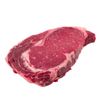
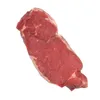
Choose the right steak
The foundation for a fantastic steak dinner starts with the perfect cut. Look for a steak with a vibrant red color throughout, indicating freshness. Good marbling — those thin streaks of fat — adds flavor and juiciness.
Here’s what to look for when browsing the meat selection:
- Color: Bright red throughout
- Marbling: Fine streaks of fat, not large chunks
- Thickness: At least 1 inch for even cooking
Season your meat
Add a bit of flair to your porterhouse or flank stank with seasoning. Even a pinch of kosher salt and pepper can elevate the flavor to new heights. If you’re feeling a bit more adventurous, give these steak seasoning combinations a try:
- Montreal steak seasoning: This French-Canadian blend features black peppercorns, coriander, garlic, onion and sometimes dill seed for a peppery and herbaceous crust.
- Cajun seasoning: Cayenne pepper brings the heat, balanced by paprika, garlic powder, onion powder and thyme for a smoky and bold flavor. Try a cayenne pepper substitute if you don’t have the spice on hand!
- Korean steak bulgogi marinade: Soy sauce, brown sugar, garlic, ginger and sesame oil create a sweet and savory marinade that tenderizes and infuses the steak with Asian flavors.
- Italian steak seasoning: Rosemary, thyme, oregano, garlic powder and onion powder bring the essence of the Mediterranean to your steak.
Grab it now on Instacart:


Let it rest
Patience is key when it comes to achieving a truly exceptional steak. After searing your steak, you might be tempted to slice it right away. It’s important to let it rest to allow the muscle fibers to relax, allowing the juices that were forced to the surface during cooking to redistribute themselves throughout the meat. This ensures each bite is bursting with flavor and stays incredibly tender.
Resting time depends on the thickness of your steak. A thicker steak will naturally take longer to cook through, so it will also require a longer resting period. Here’s a general guide for how long you should wait:
- 1-inch cuts: 5 minutes
- 1-2-inch cuts: 5-10 minutes
- 2-inch+ cuts: 10+ minutes
Add the finishing touches
A perfectly cooked steak deserves a little adornment, and finishing sauces and butters are great final flourishes. These quick and easy additions add layers of flavor and richness, taking your steak dinner from good to gourmet.
Sauces:
- Classic béarnaise: This creamy French sauce features butter, egg yolks, shallots, tarragon and white wine vinegar for a decadent and luxurious touch.
- Bold chimichurri: This Argentinian staple is a vibrant and herbaceous sauce made with chopped parsley, garlic, olive oil, red wine vinegar and sometimes chilis for a bright and flavorful finish.
- Peppery pan sauce: Deglaze your pan drippings with wine or broth, then whisk in butter and cracked black pepper for a simple yet elegant sauce that captures all the caramelized goodness from cooking the steak.
Butters:
- Garlic butter: Infuse softened butter with minced garlic and fresh herbs like parsley or thyme for a simple and fragrant topping.
- Blue cheese butter: For a decadent touch, combine softened butter with crumbled blue cheese and a touch of honey for a creamy, rich topping.
- Compound butters: Get creative! Experiment with different flavor combinations like roasted shallots and red wine, sun-dried tomatoes and capers or lemon zest and fresh cracked pepper.
Time to get grilling
Is your mouth watering yet? From decadent filet mignon to peppery porterhouses, it’s time to start prepping your next sizzling entree with our simple steak cooking chart to guide you.
Tight schedule? We’ve got you covered. Shop your local grocer’s best cuts with Instacart’s quick and easy grocery delivery or pickup.

Cady Cohen
Author
Cady Cohen is a culinary writer at Instacart who empowers home cooks to navigate the exciting world of food with confidence. She has worked in digital media for over seven years covering food, health, and wellness. From handy conversion charts and recipe calculators to in-depth cooking guides, Cady's work makes grocery shopping a breeze and empowers you to make informed choices about what you put on your plate.
Heather Matley
Editor
Heather Matley is an editor at Instacart whose passion for food and cooking has inspired her work on everything from grocery guides to recipe development. With over eight years of experience in editing, content creation, and search engine optimization, she strives to empower readers with the most effective tools, guides, and ideas to transform their home cooking. 17 Grocery List Categories to Make Shopping Easy
  How to Meal Plan: Step-by-Step Guide to Meal Planning
  How To Read Food Labels: Guide to Nutrition Labels

Most Recent in Planning & Prep

Planning & Prep
How To Cook Tofu: Guide to Tofu Cooking Methods
Let’s face it: Tofu has a bad reputation. For years, it’s been the target of harsh jokes that it’s bland and rubbery. But this versatile ingredient can actually be delicious, and it’s capable of transforming…...
Aug 28, 2024
Planning & Prep
10 Most Common Dietary Restrictions
Dietary restrictions are meal plans that limit or remove certain ingredients or whole categories of foods. The most common dietary restrictions may be associated with specific health issues, religious beliefs or physical intolerances, but some…...
Aug 20, 2024
Planning & Prep
Easy Ways To Send Flowers to a Hospital
A hospital stay can be a stressful time for both the patient and their loved ones. While you might not be able to be there in person, sending a thoughtful gift can offer a much-needed…...
Aug 6, 2024